
One viewport, a tool for each job.
The mountain stays in the center while the surrounding tools change with your mode and selection. Start by learning where to look.
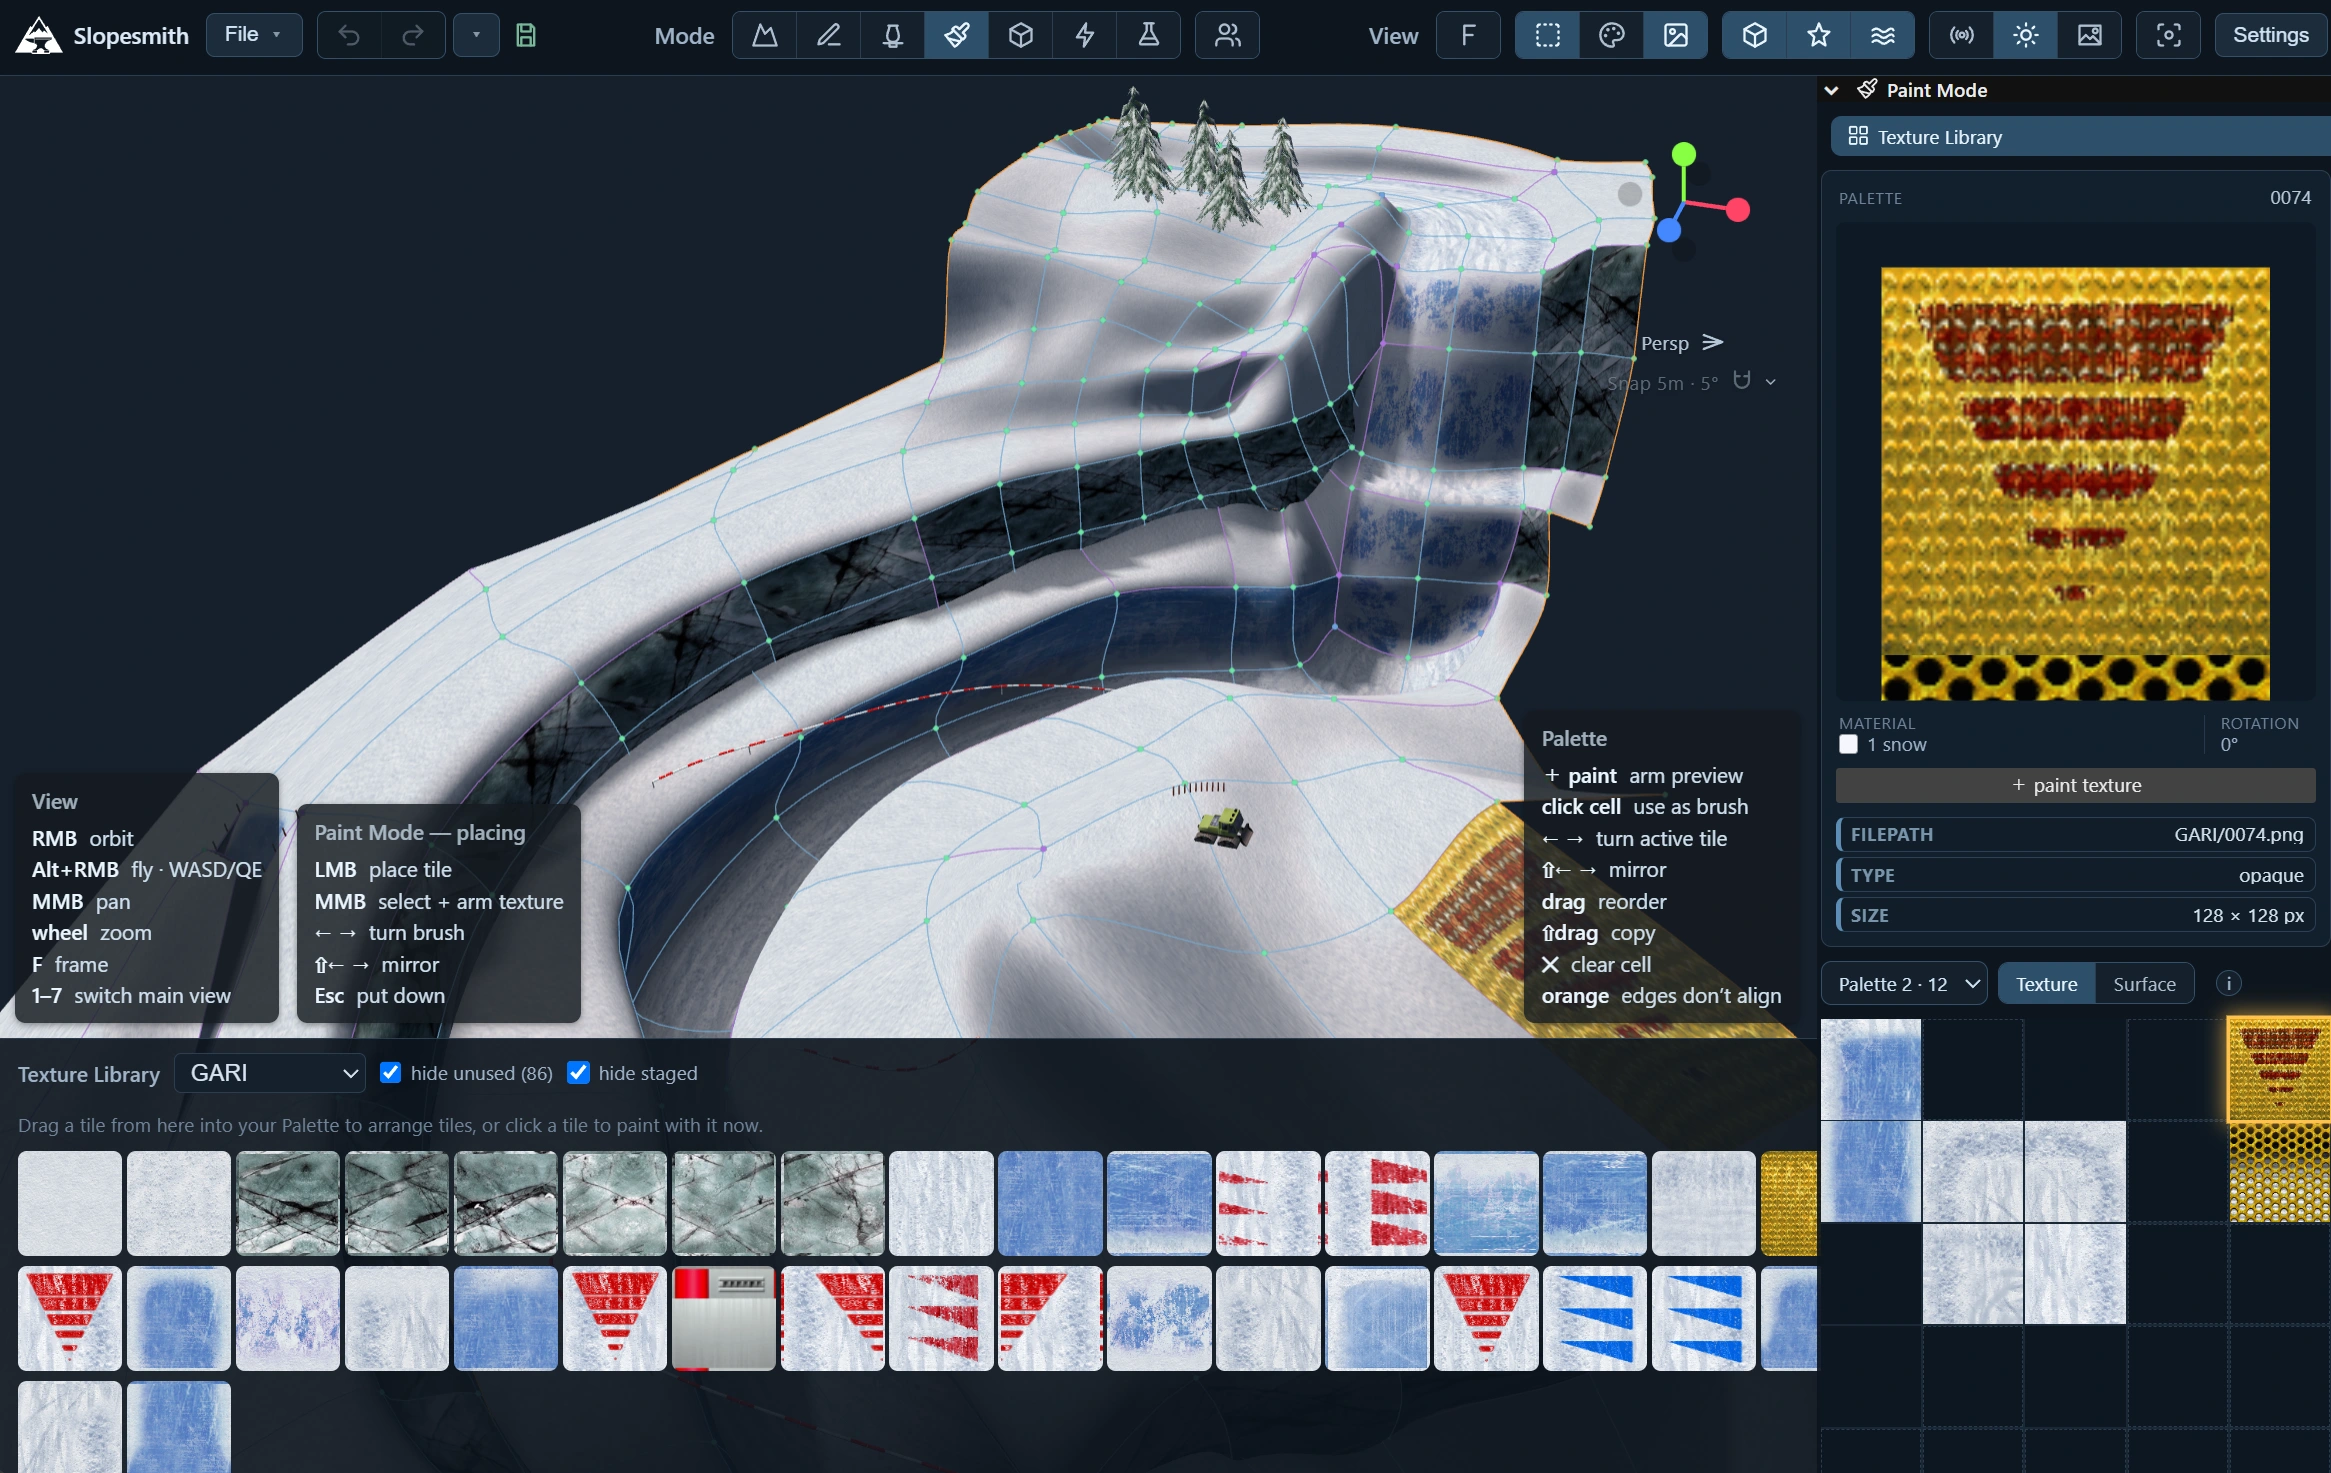
- 1 Top: mode bar
- Switch between Scene, Edit, Sculpt, Paint, Props, Effects, and Test. View controls change which overlays and scene elements you see.
- 2 Center: the viewport
- Select terrain, manipulate controls, and inspect the mountain from different angles. The move gizmo’s colored axes let you position the current selection.
- 3 Right: tools and properties
- This panel follows the active mode and selected object. It is the place to check what you selected and which actions are available.
- 4 Bottom: libraries and hints
- Texture and prop libraries open here when needed. The control hints in the viewport explain the current mouse and keyboard actions.
About these screenshots: the examples span development versions and include both authored mountains and locally imported reference courses. Button placement can differ from your build, and imported game assets are not bundled with Slopesmith. Use the mode names and current on-screen hints to orient yourself.
Move around before you edit
| Action | Control |
|---|---|
| Orbit the view | Right mouse button + drag |
| Pan | Middle mouse button + drag |
| Zoom | Mouse wheel |
| Frame the selection | F |
| Fly through the scene | Alt + right mouse button, with W A S D / Q E |
01. Define the route in Scene.
Open Scene → Course to work with the course line. The green knots mark positions along the route; select a knot and use the move gizmo to place it. Its panel exposes settings such as floor width and checkpoint bonus.
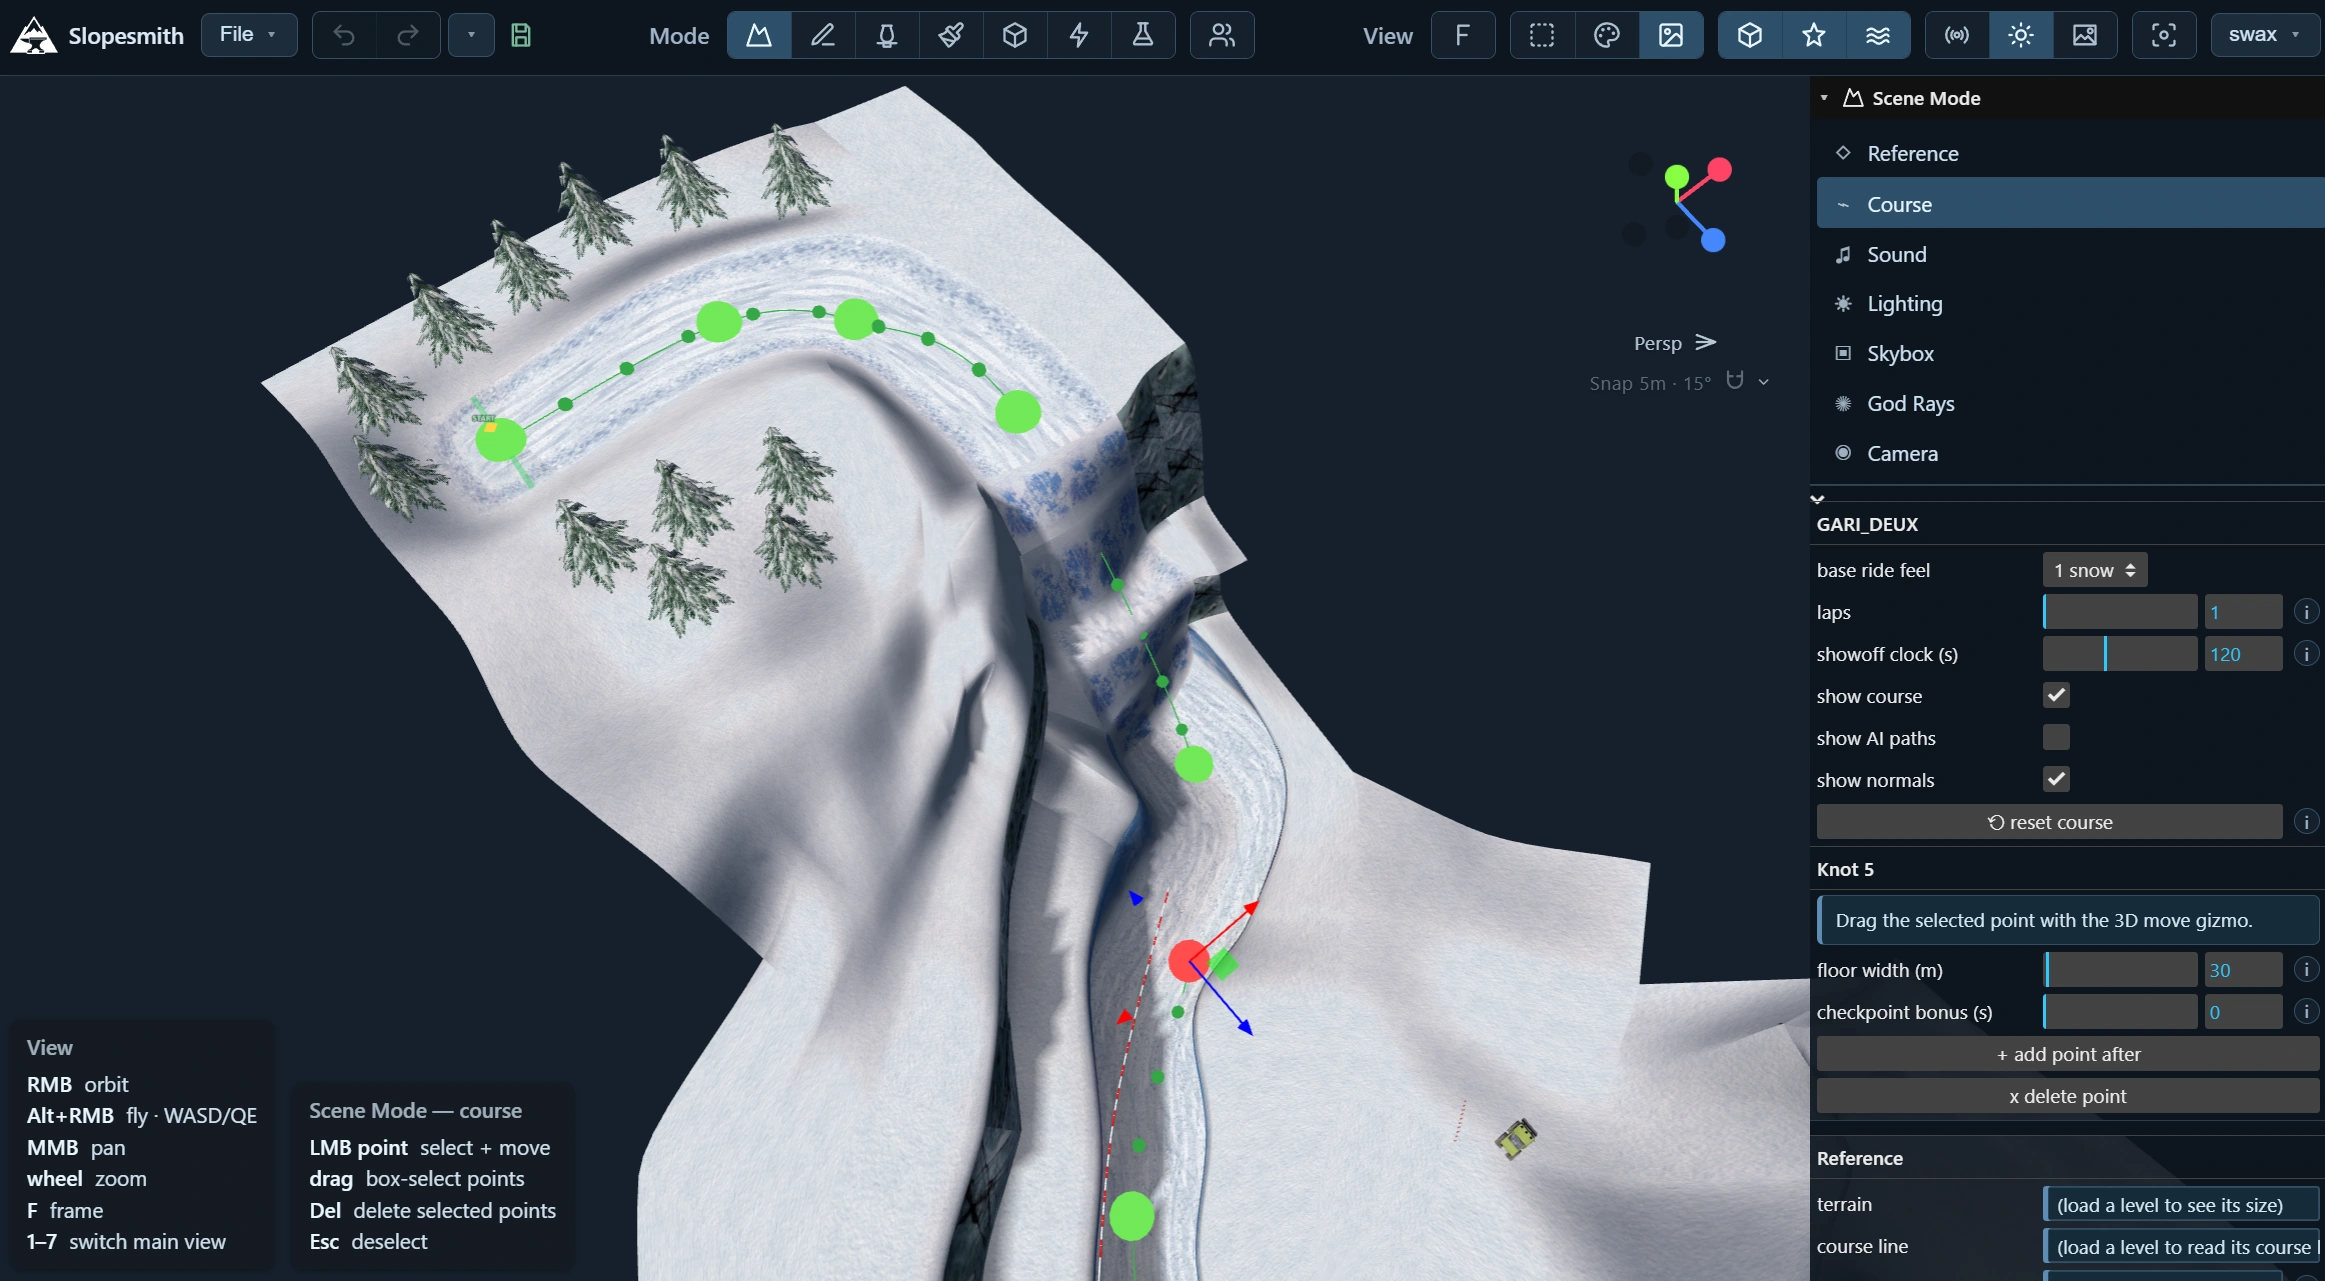
The course line describes the route. It is distinct from the terrain surface and from the trail-building tool. Moving a course knot does not automatically reshape an existing mountain.
Try this: trace the intended path with the course line and check that its start actually sits on the terrain. Then inspect the first turn from the rider’s approach.
02. Pick the mode for the task.
| Mode | Use it for |
|---|---|
| Scene | Course setup, reference maps, lighting, sound, and sky settings. |
| Edit | Points, edges, patches, trail construction, and precise geometry changes. |
| Sculpt | Brush-based changes to the terrain’s shape. |
| Paint | Texture tiles, palettes, orientation, and the brush’s ride surface. |
| Props | Objects, custom models, rails, pickups, and their placement. |
| Effects | Attached behavior, triggers, effect graphs, and node inspection. |
| Test | Riding the authored mountain or a loaded reference. |
Continue with terrain and trails for geometry, or textures and surfaces for painting.
03. Give the mountain some landmarks.
In Props, open the Prop Library. Choose a library, use the search to narrow the list, and pick a model. Click the mountain to place it, then adjust its position, rotation, and scale.
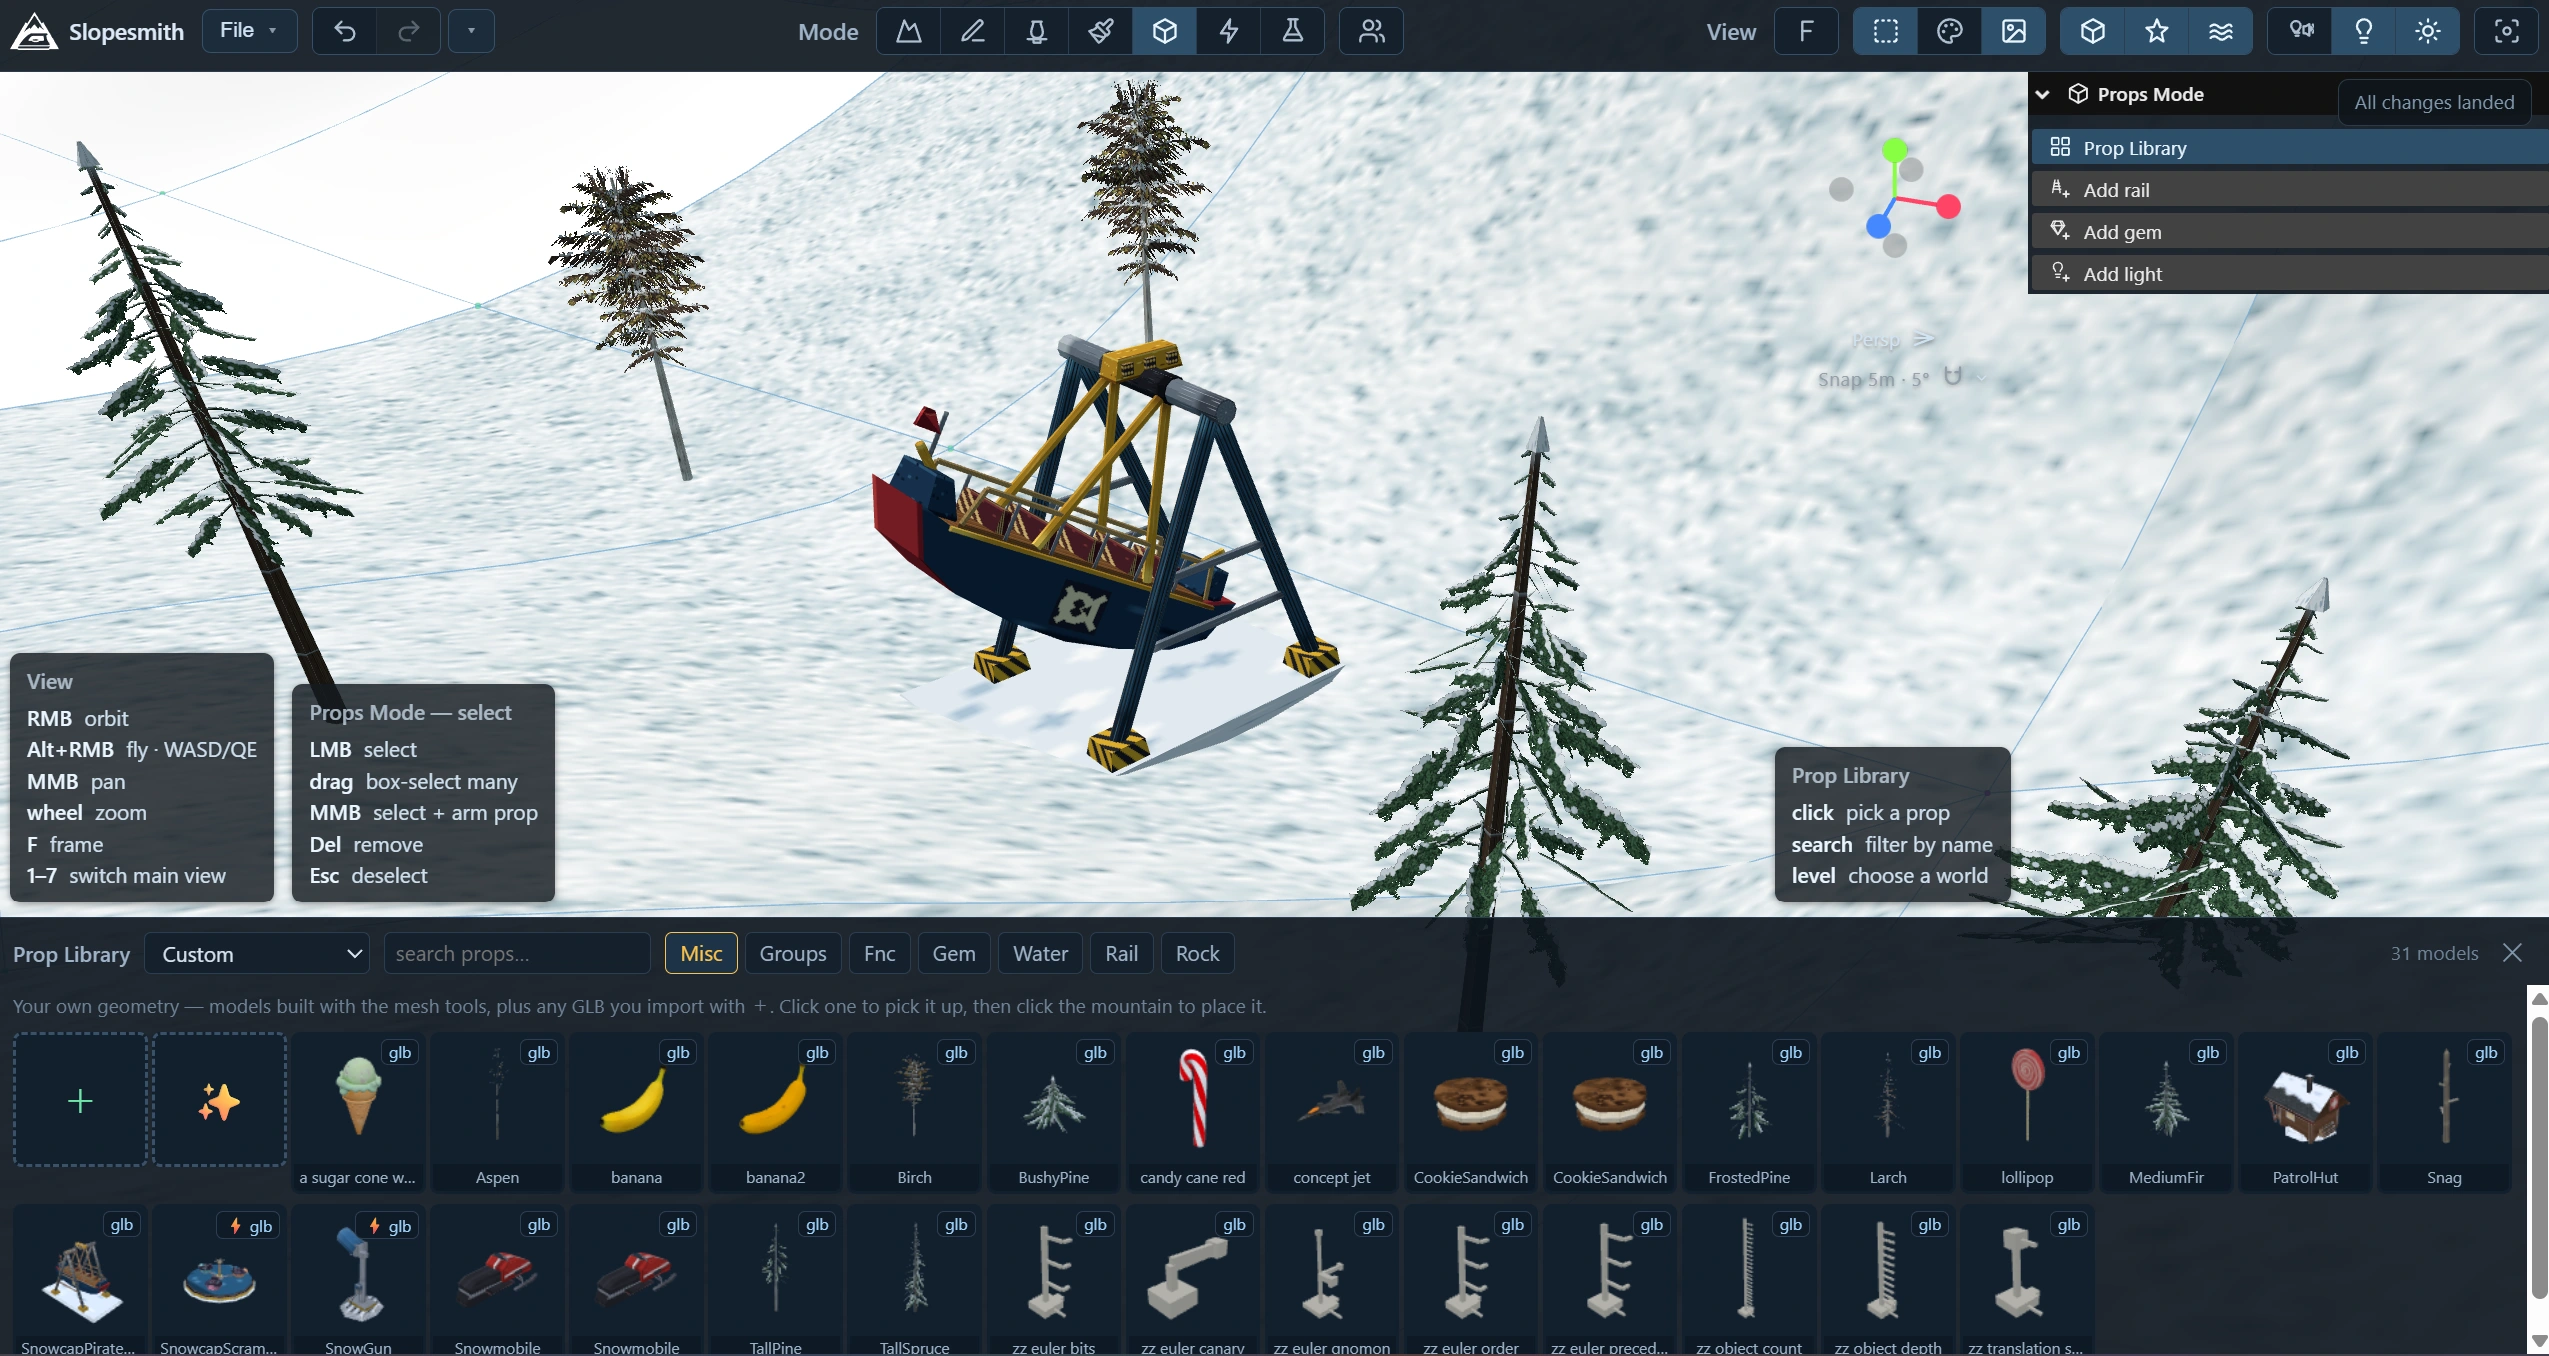
The Custom library is where your own models live. The + tile supports importing compatible GLB models. A library item is the model; a placed prop is an instance of it in the course.
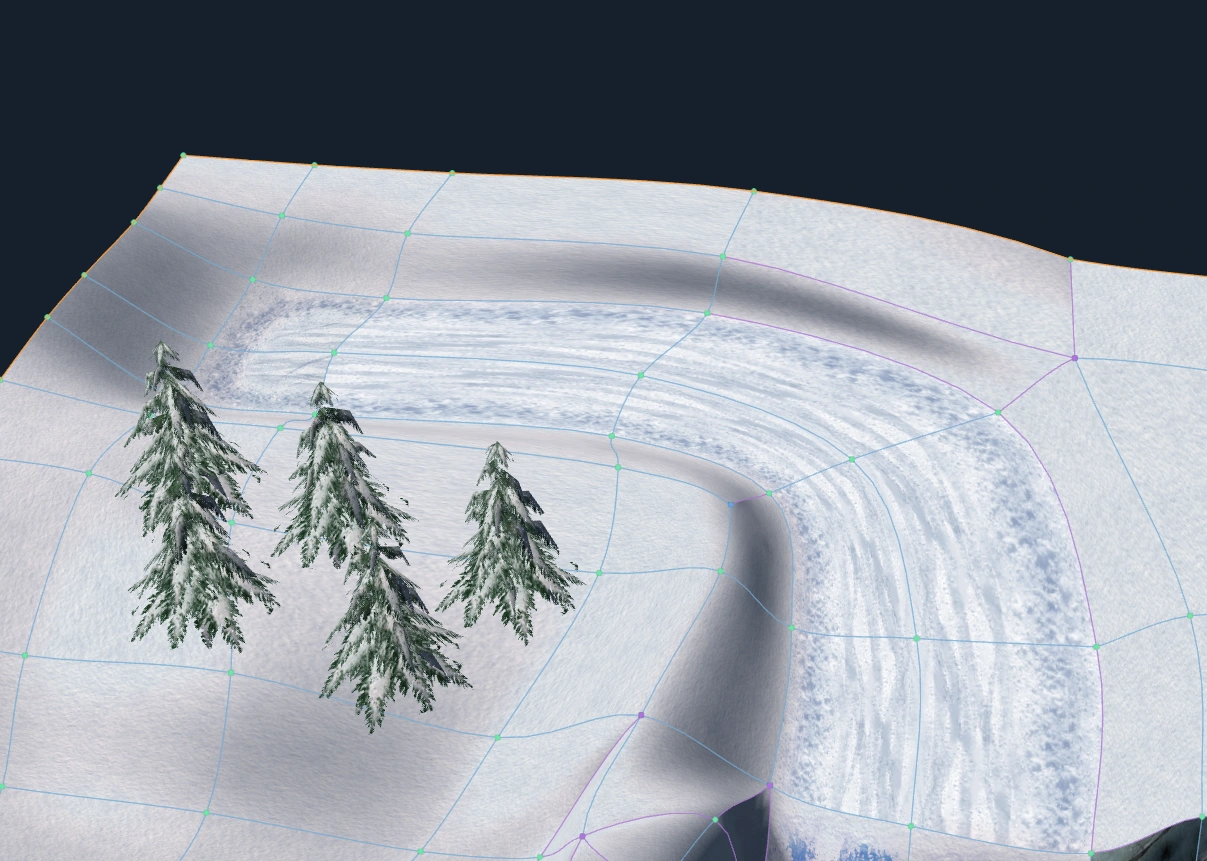
Try this: place a few landmarks around one turn, then test the approach. If they hide the exit or obstruct the landing, adjust them before adding more.
See the custom-model guide for supported imports and the prop documentation for placement details.
04. Follow the behavior attached to a prop.
Switch to Effects and select a prop. If it already has an effect, its graphs and nodes appear in the panel. Choose an effect, inspect a node, and use Preview effect when available to see what it does.
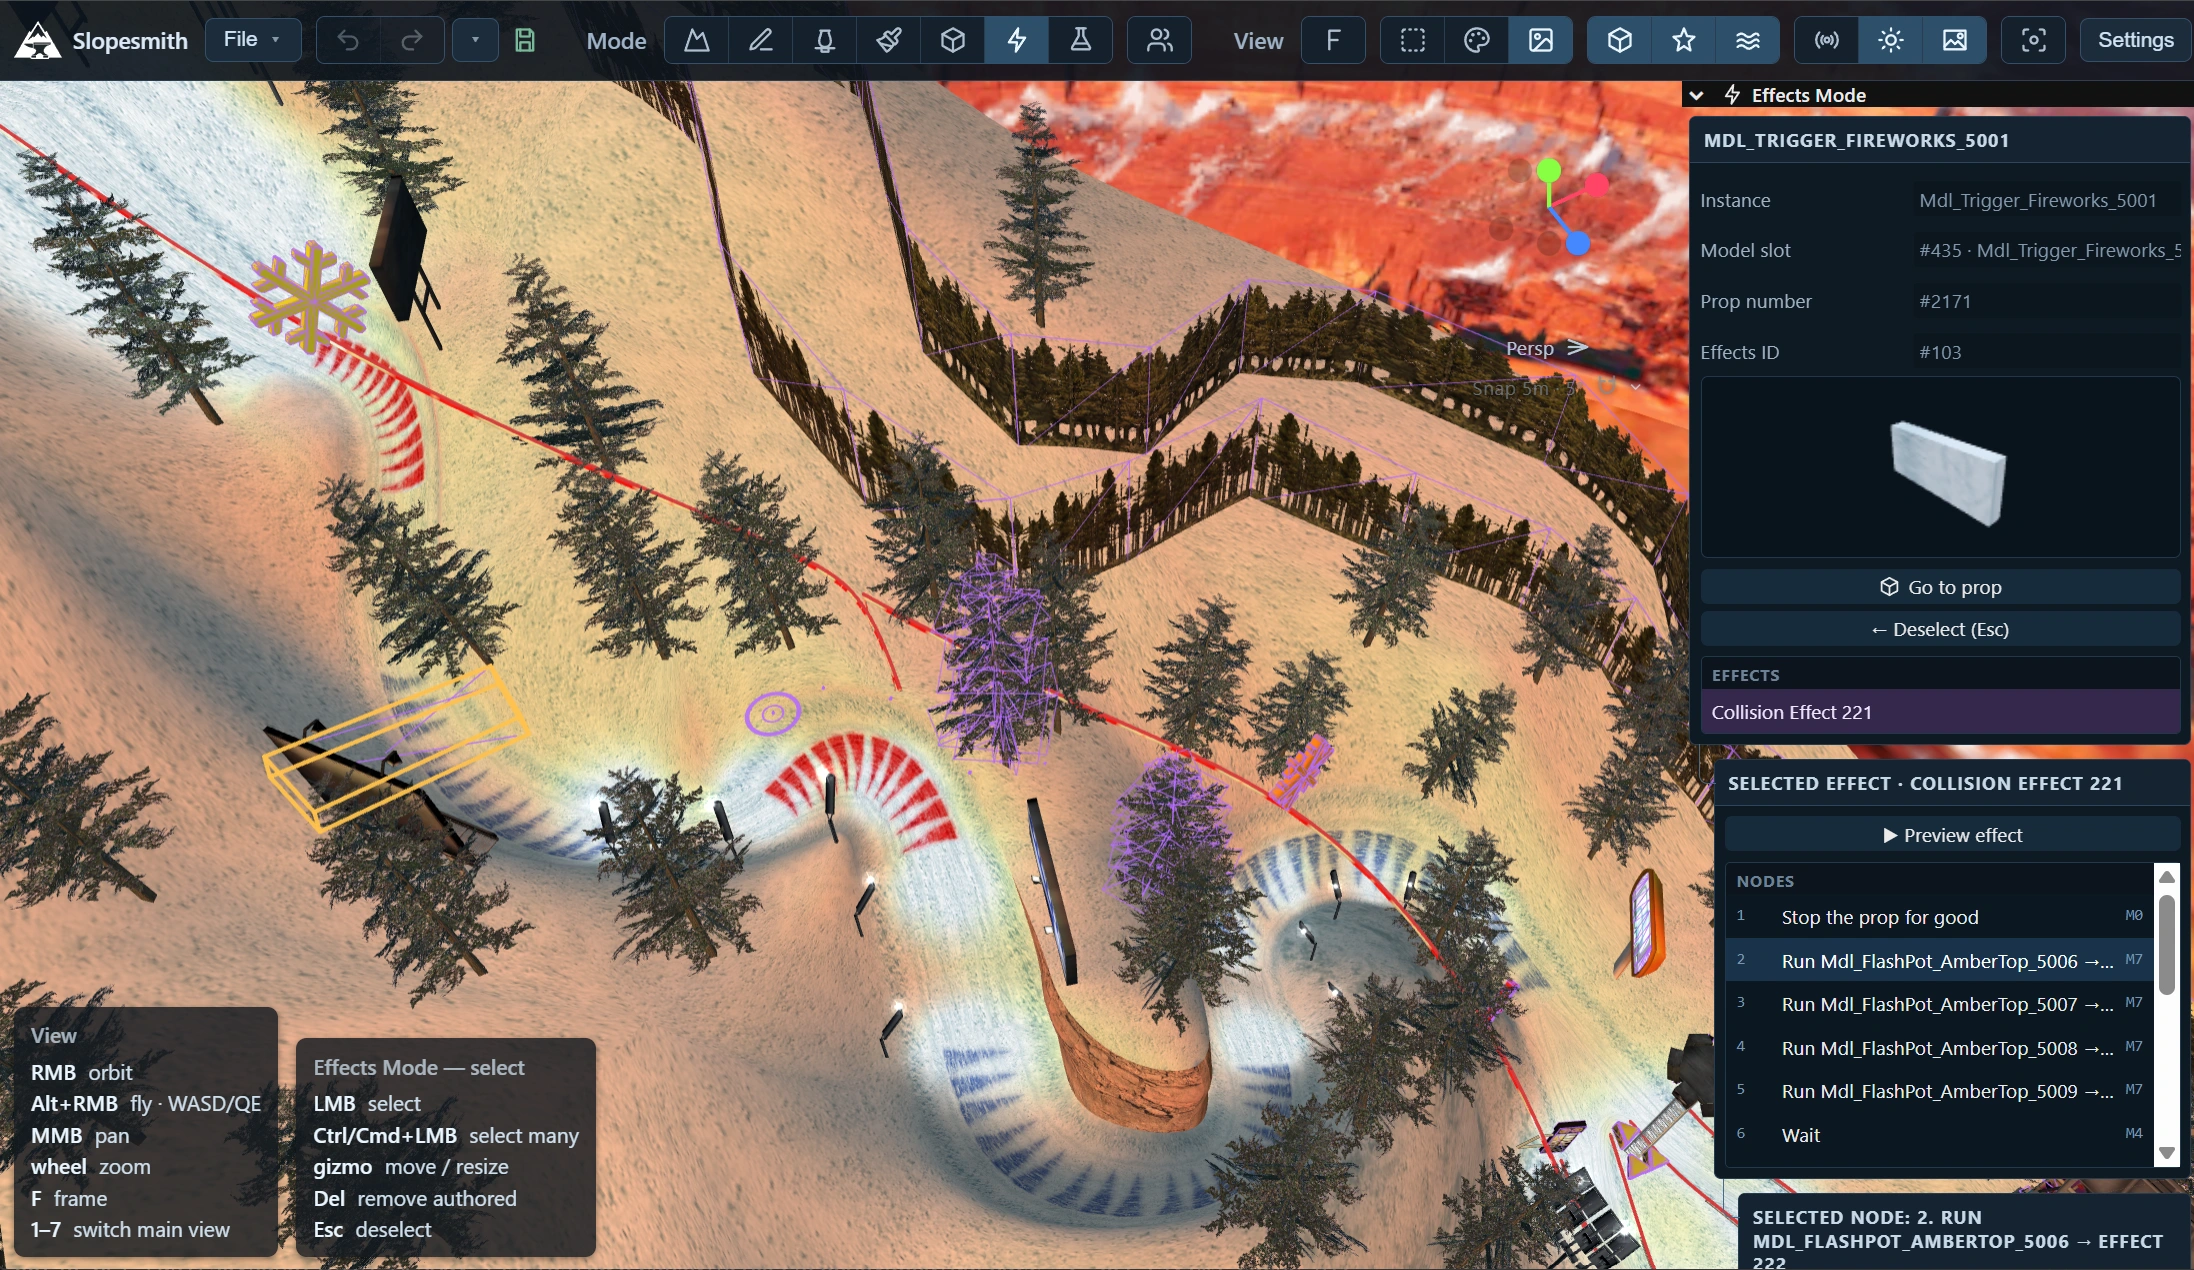
To author behavior, start with a prop and its + Add effect action. Read the template’s description and any caveats before choosing it. A simple behavior is easier to test than several new effects added at once.
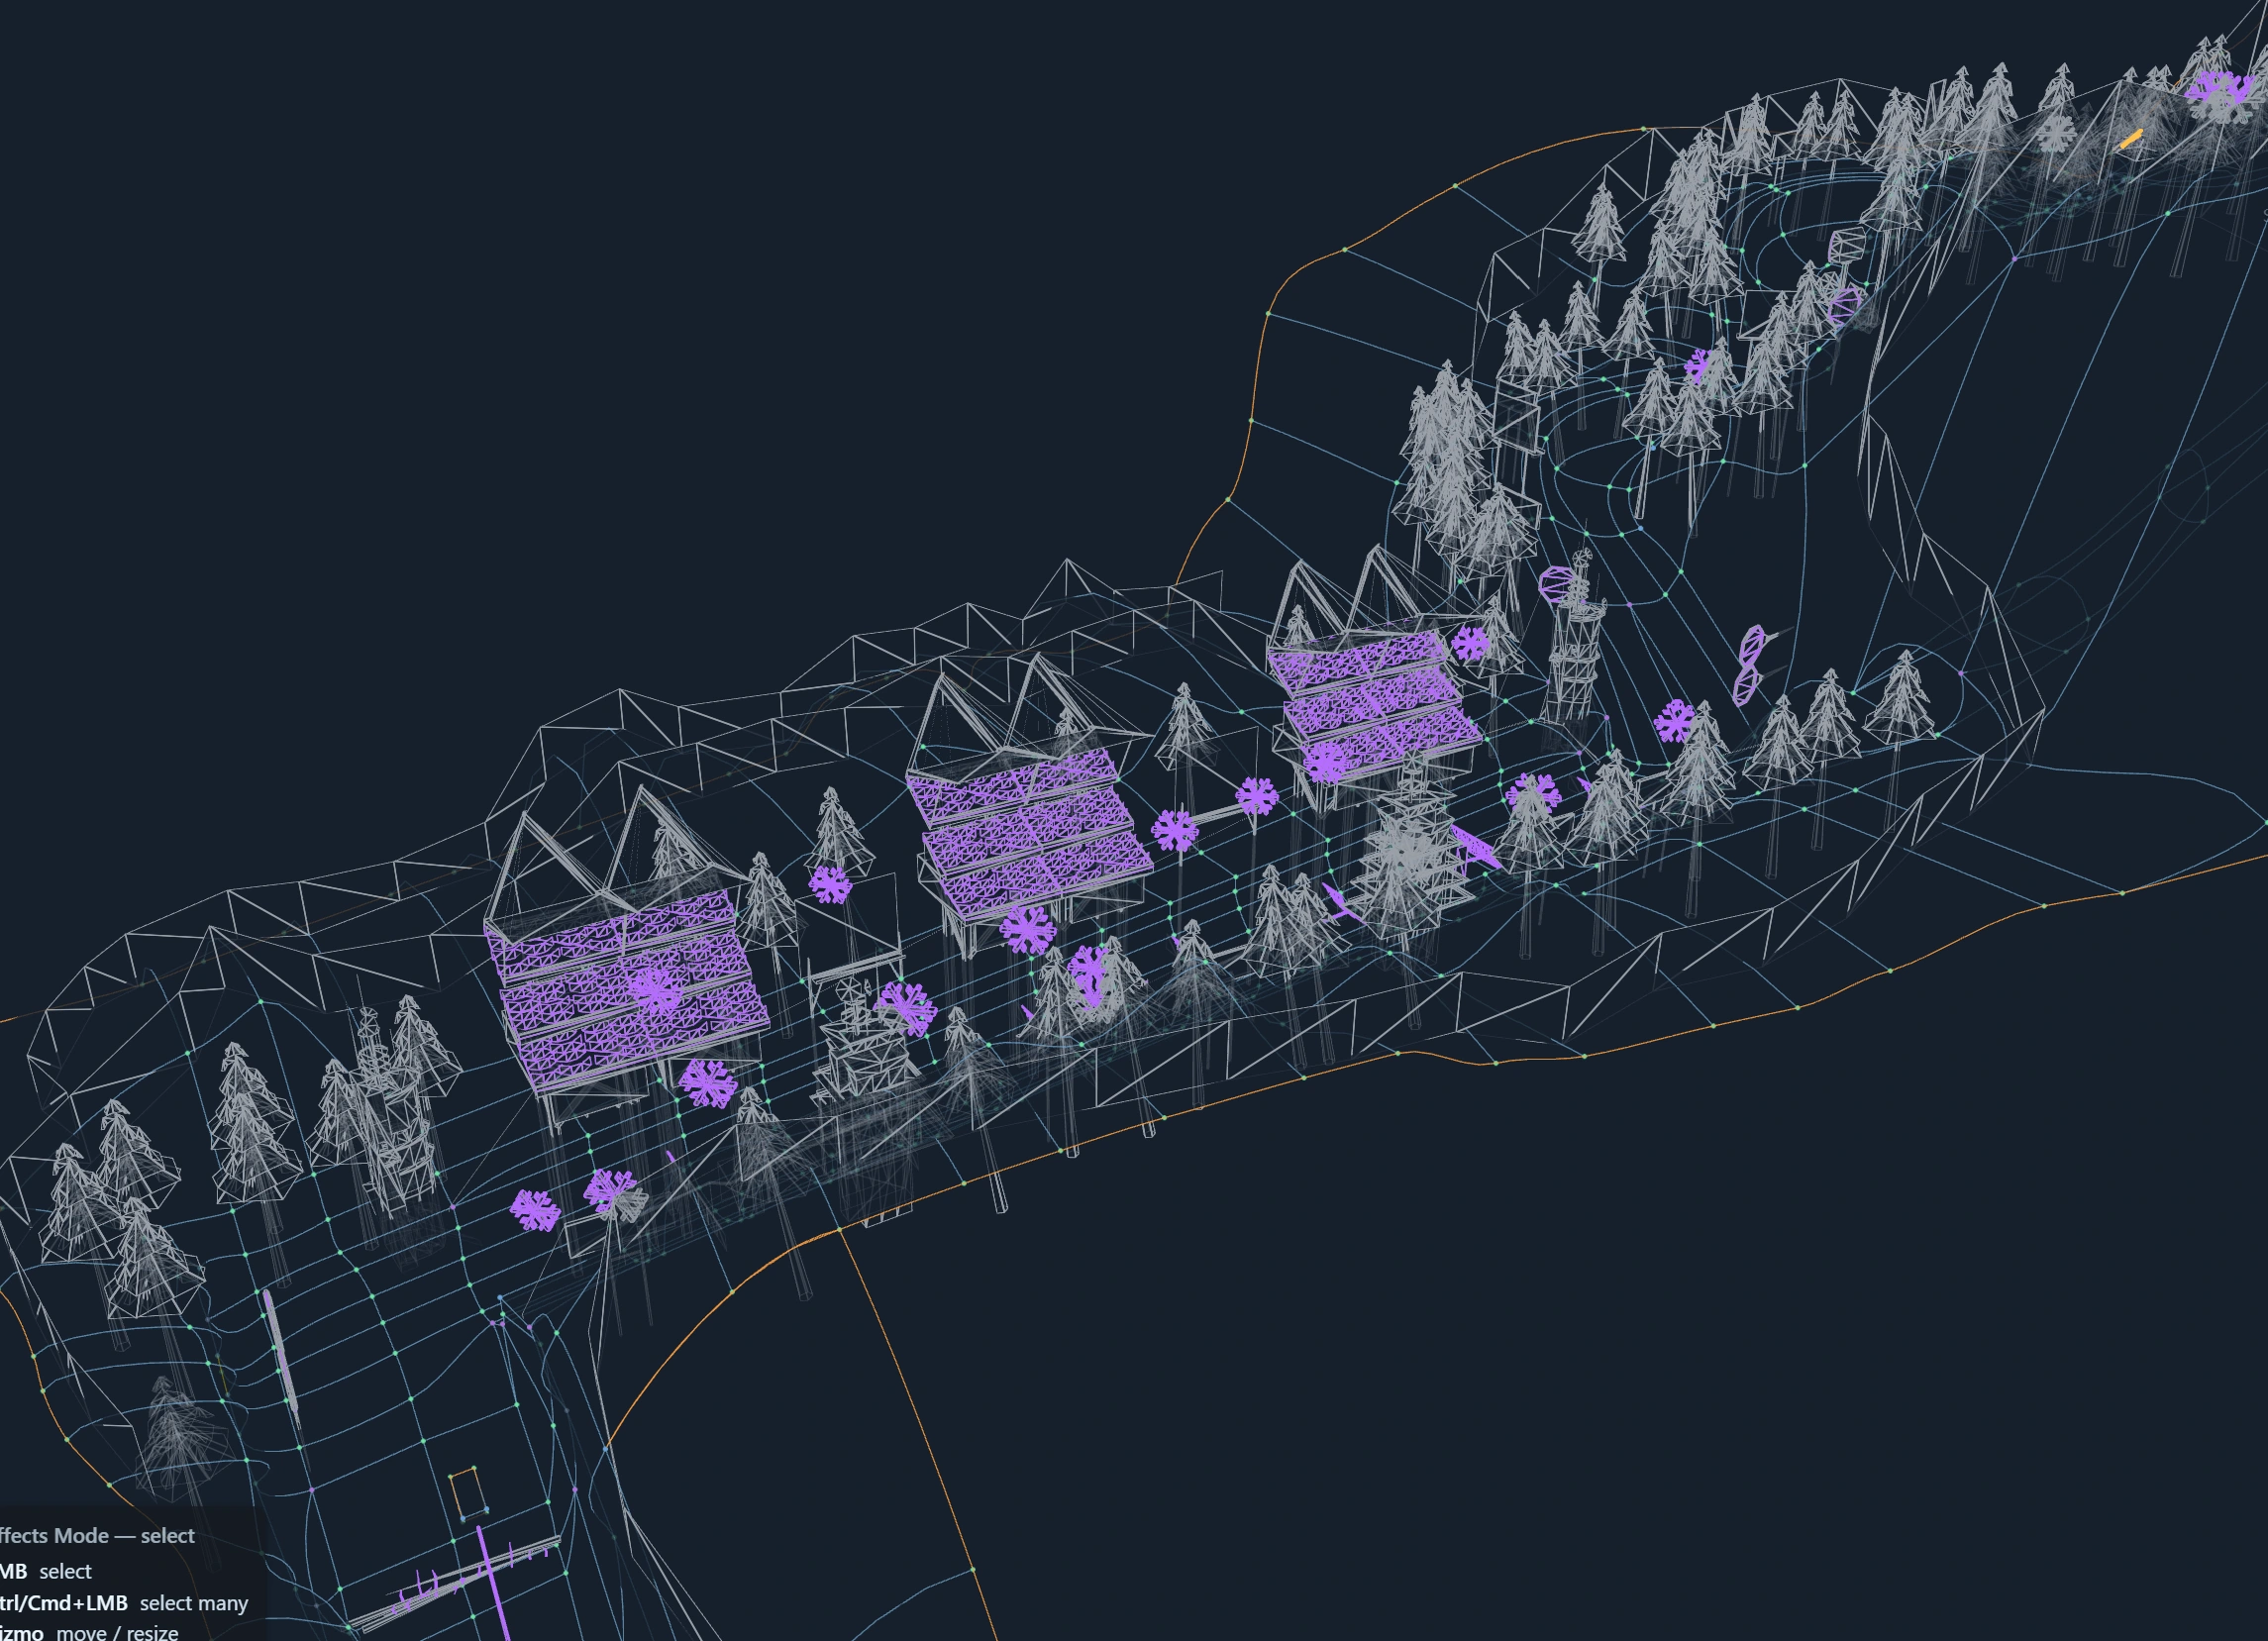
View overlays help when the scene gets busy. Use wireframe to inspect the terrain and object geometry, then return to the normal view to judge how the scene reads while riding. The effects reference explains graph editing in detail.
05. Ride before you decorate everything.
Enter Test, select your mountain rather than the reference world, and start a run. Look for awkward transitions, unexpected collisions, and places where the route is hard to read.
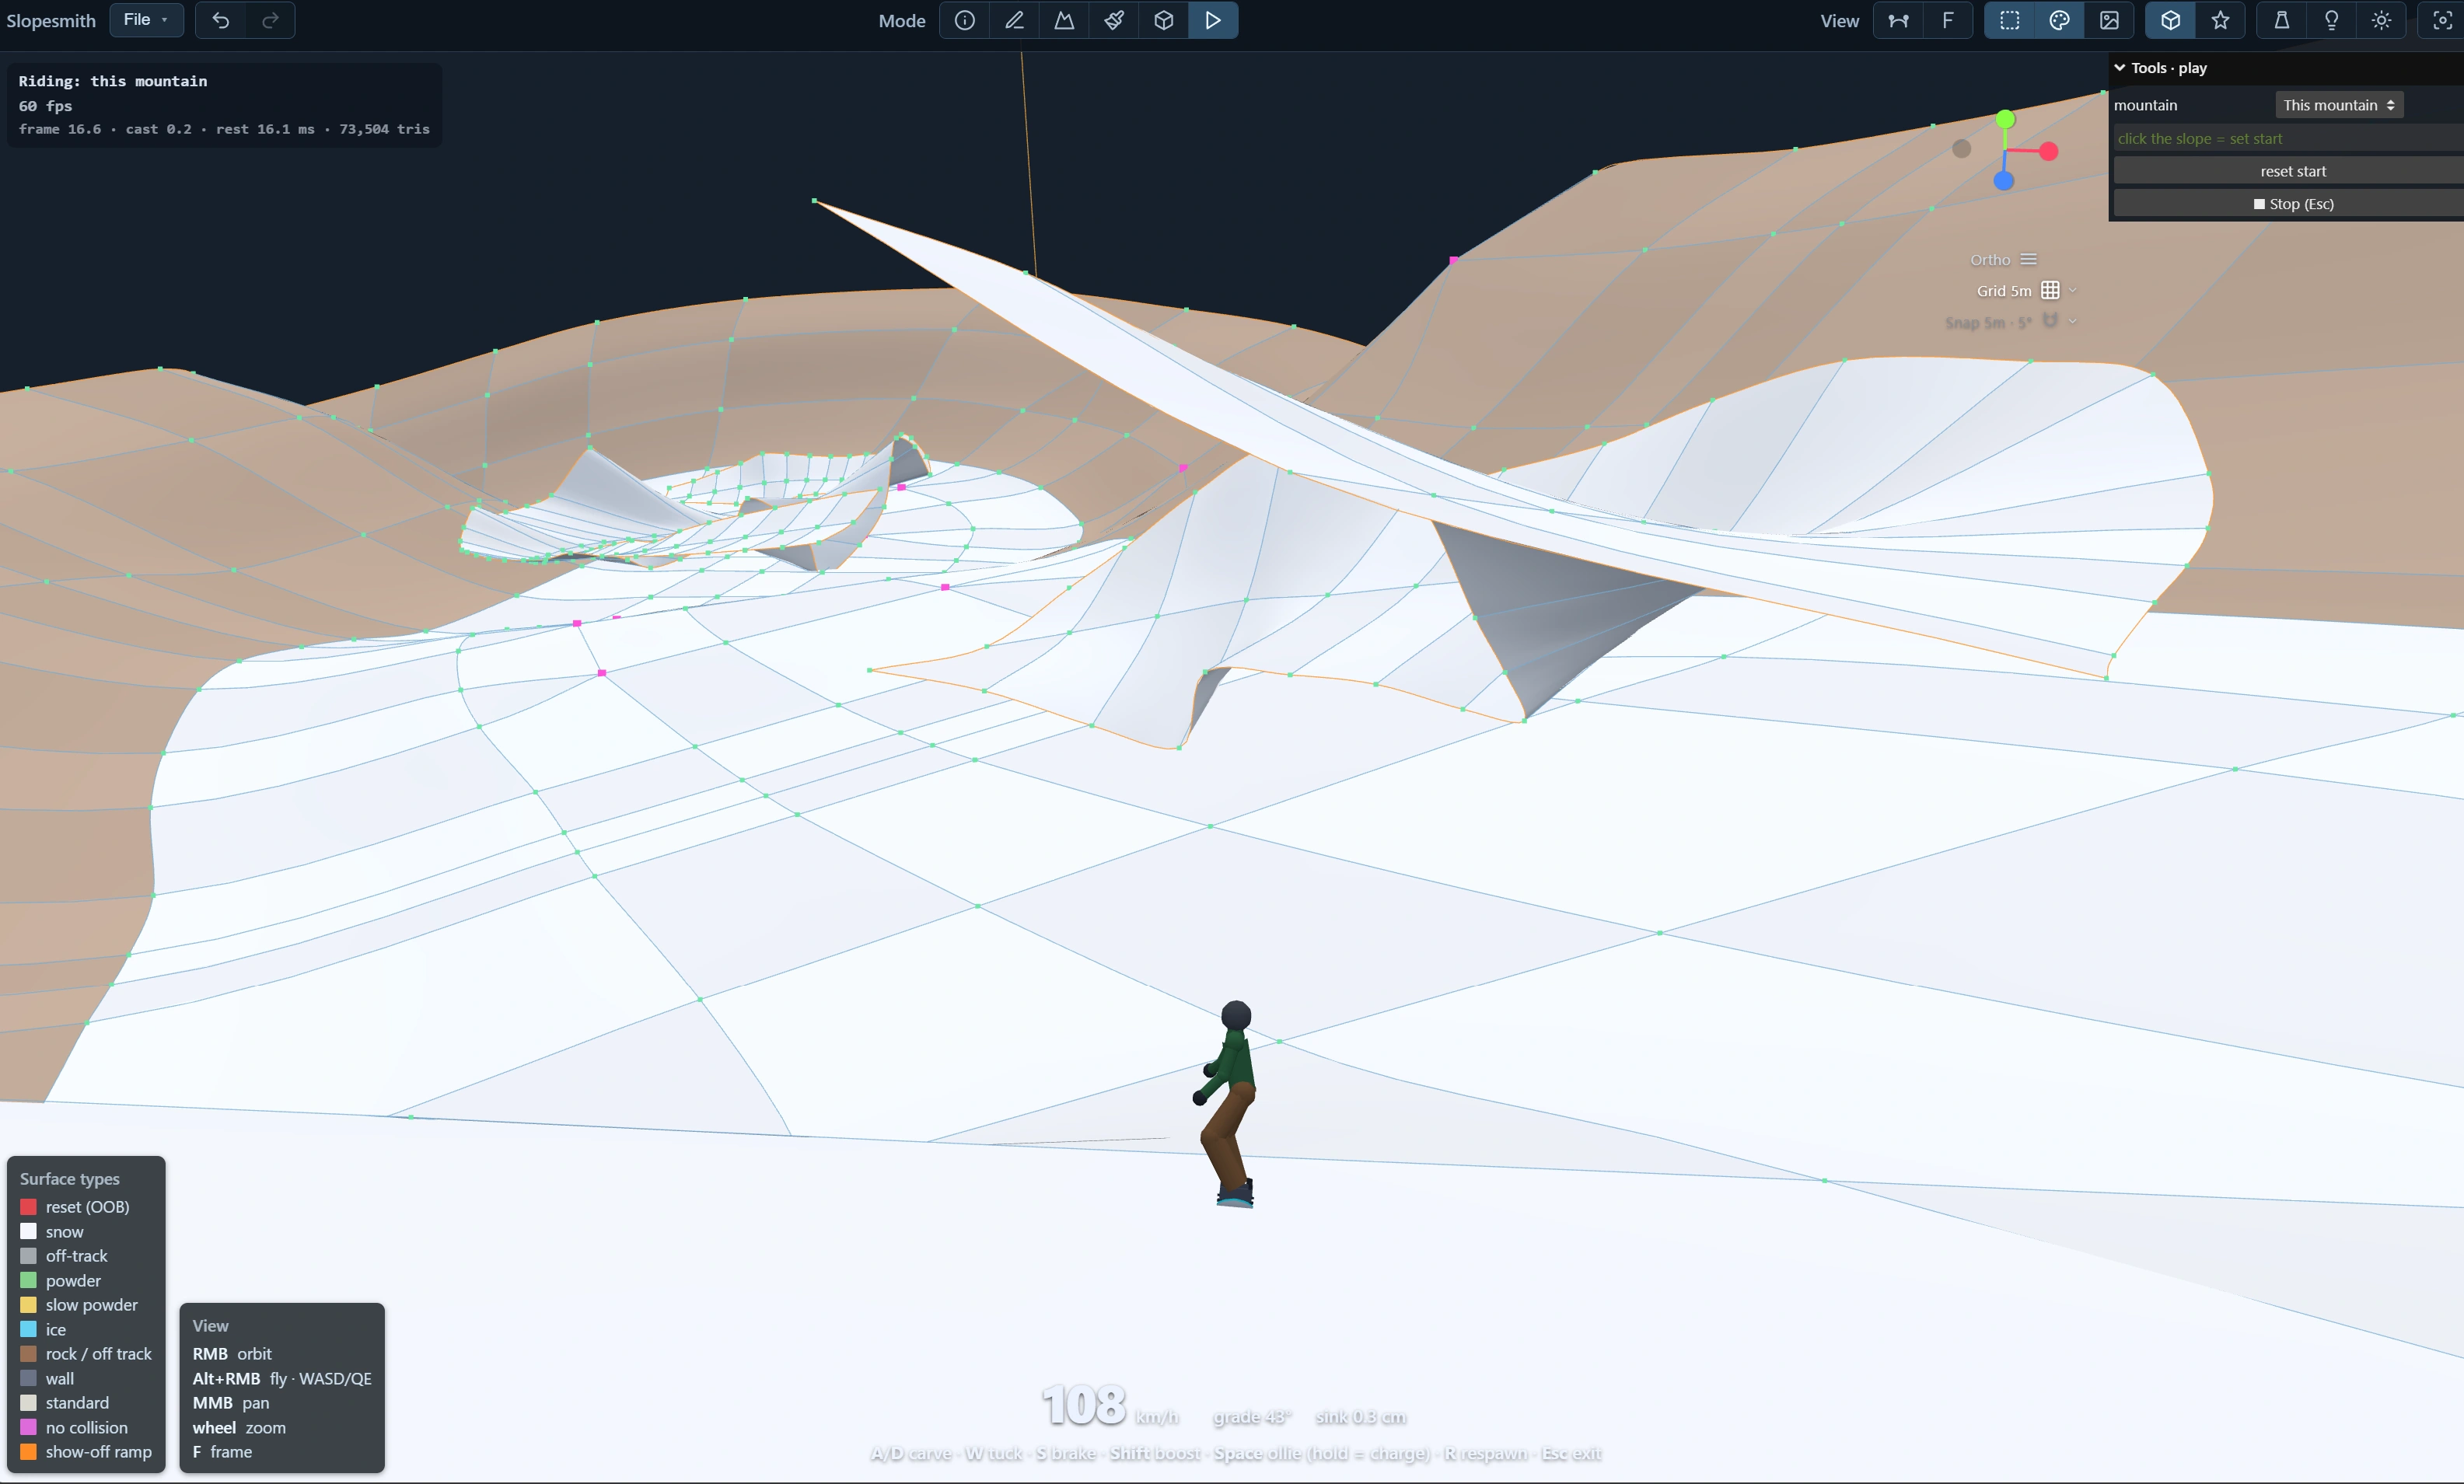
Stop the run, return to the appropriate editing mode, change one thing, and test again. The goal of an early run is to find out whether the route works, even while much of the mountain is unfinished.
Try this: ride one turn three times. Once to follow the center, once to take the inside, and once to approach from the outside. Give all three lines enough room to recover.