
01. Choose a tile from the library.
Switch to Paint and open the Texture Library. Choose the appropriate project or library, then click a tile to pick it up as a brush.
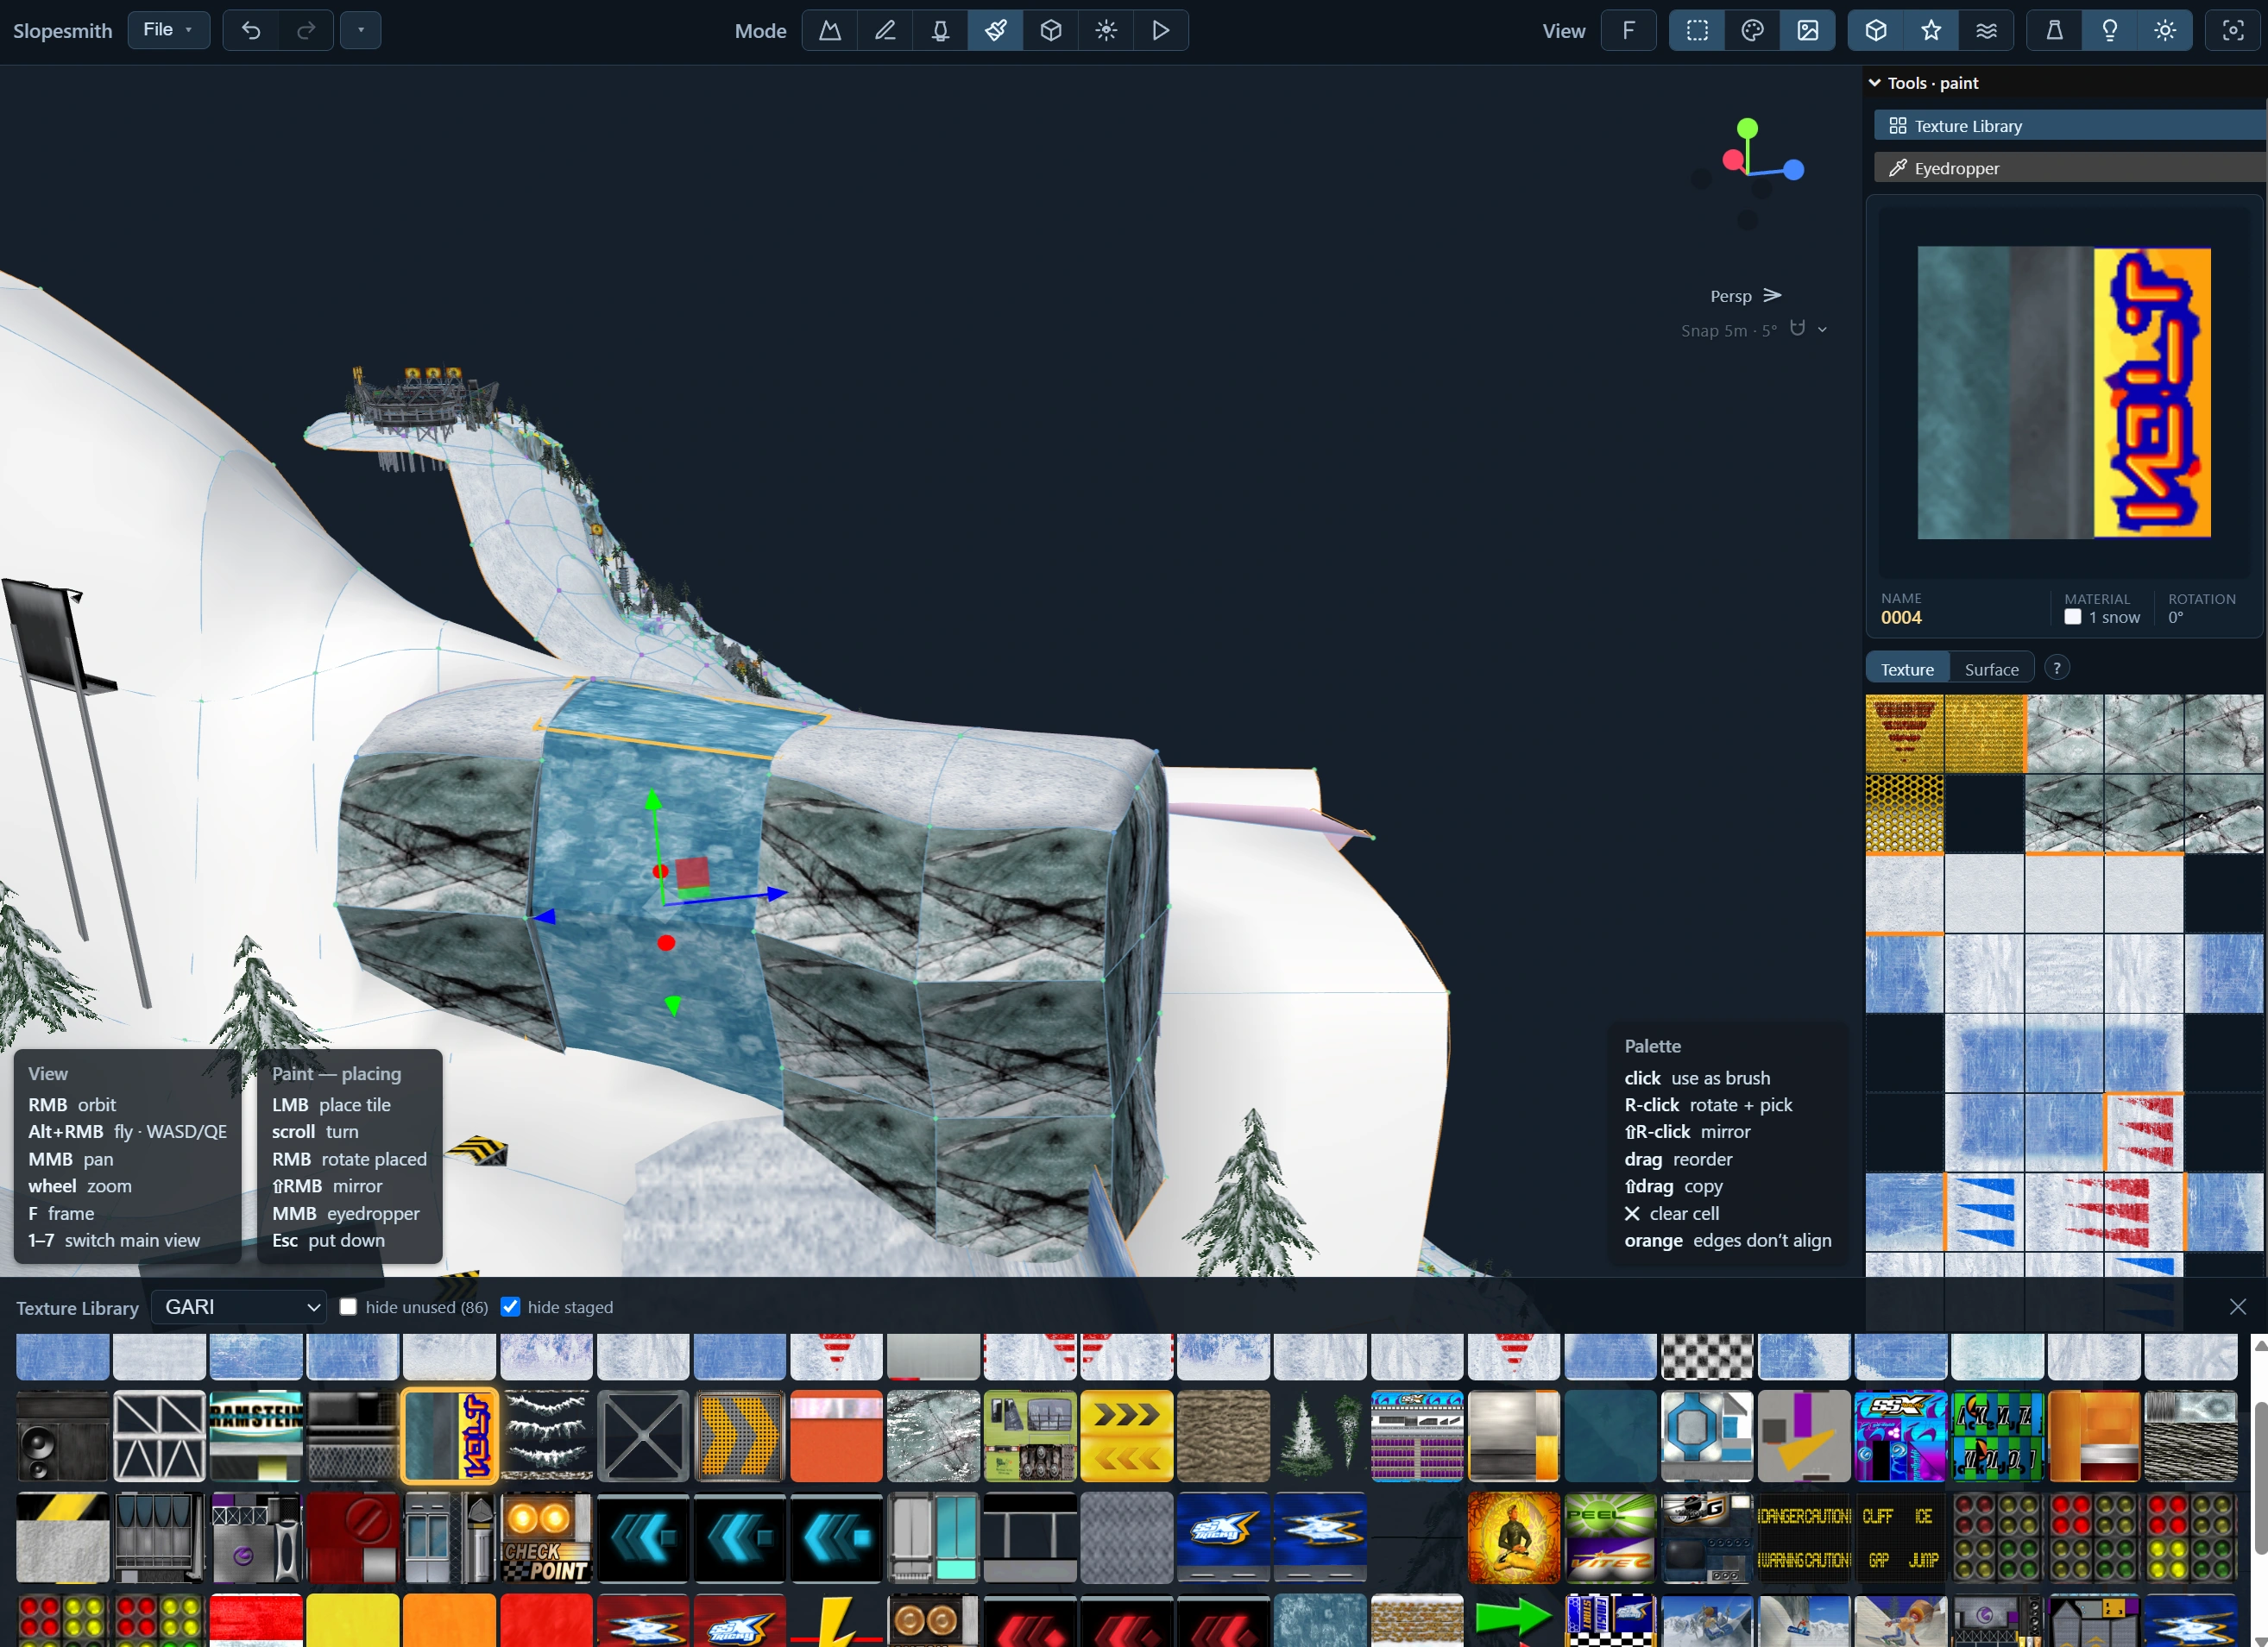
The library is your collection of available images. A palette is a smaller arrangement you put together for the part of the course you are painting.
Use the assets available to your project. This screenshot shows a locally imported reference library and an earlier interface. Those retail textures do not ship with the editor. Original courses can use your own textures from the Custom library.
For custom art, use the library’s upload control. See the texture documentation for supported files and import behavior.
02. Put neighboring tiles together.
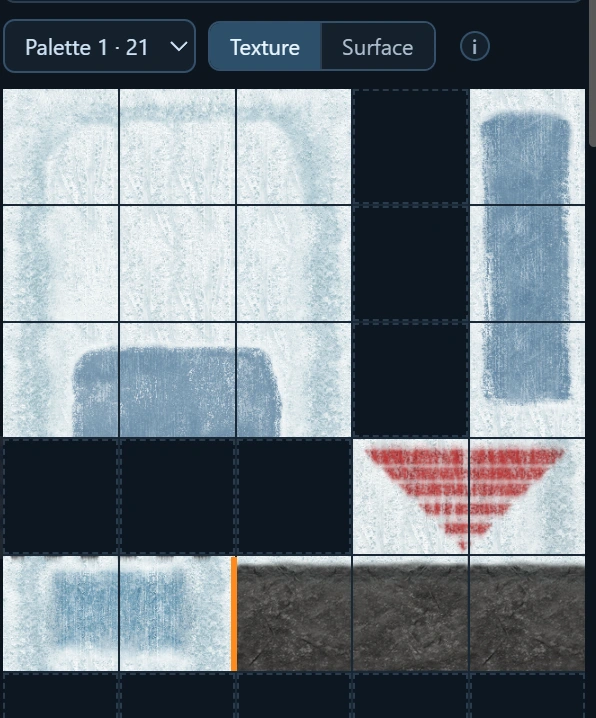
Drag related tiles into a palette so you can see how their edges meet. Keep a small set for the current feature: a few snow tiles, a transition, and the material along its boundary.
Read the joins.
Look for matching edges where snow becomes ice or where a marker crosses a seam. Rotate or mirror a tile deliberately; the wrong orientation can break a visual line.
Orange edge markers identify seams that do not align. Use them to review the arrangement before painting a large area.
Try this: arrange a short strip of three or four tiles, paint one section, and inspect it from the rider’s approach.
03. Place, rotate, inspect.
Paint mode has two useful states: placing, when you are holding a brush, and select, when you have put it down.
| Action | Control |
|---|---|
| Paint a patch | Left-click while holding a tile; drag to paint a stroke. |
| Turn the tile | ← / → |
| Mirror the tile | Shift + ← / → |
| Sample and pick up a tile | Middle-click the textured surface. |
| Put the brush down | Esc |
| Inspect without painting | Left-click a patch while no brush is held. |
Watch the ghost preview before you click. It shows the tile’s placement and orientation on the hovered patch. One patch carries one terrain tile, so the patch layout matters when you want a material boundary in a specific place.
Some screenshots show older controls. Follow the current viewport hints if the build you are using differs.
04. Check what the brush feels like.
A texture and a surface type are stored as separate properties, but the paint brush carries both. Painting a tile also writes the brush’s ride feel. Do not assume that an image resembling snow or ice is enough to give it that behavior.
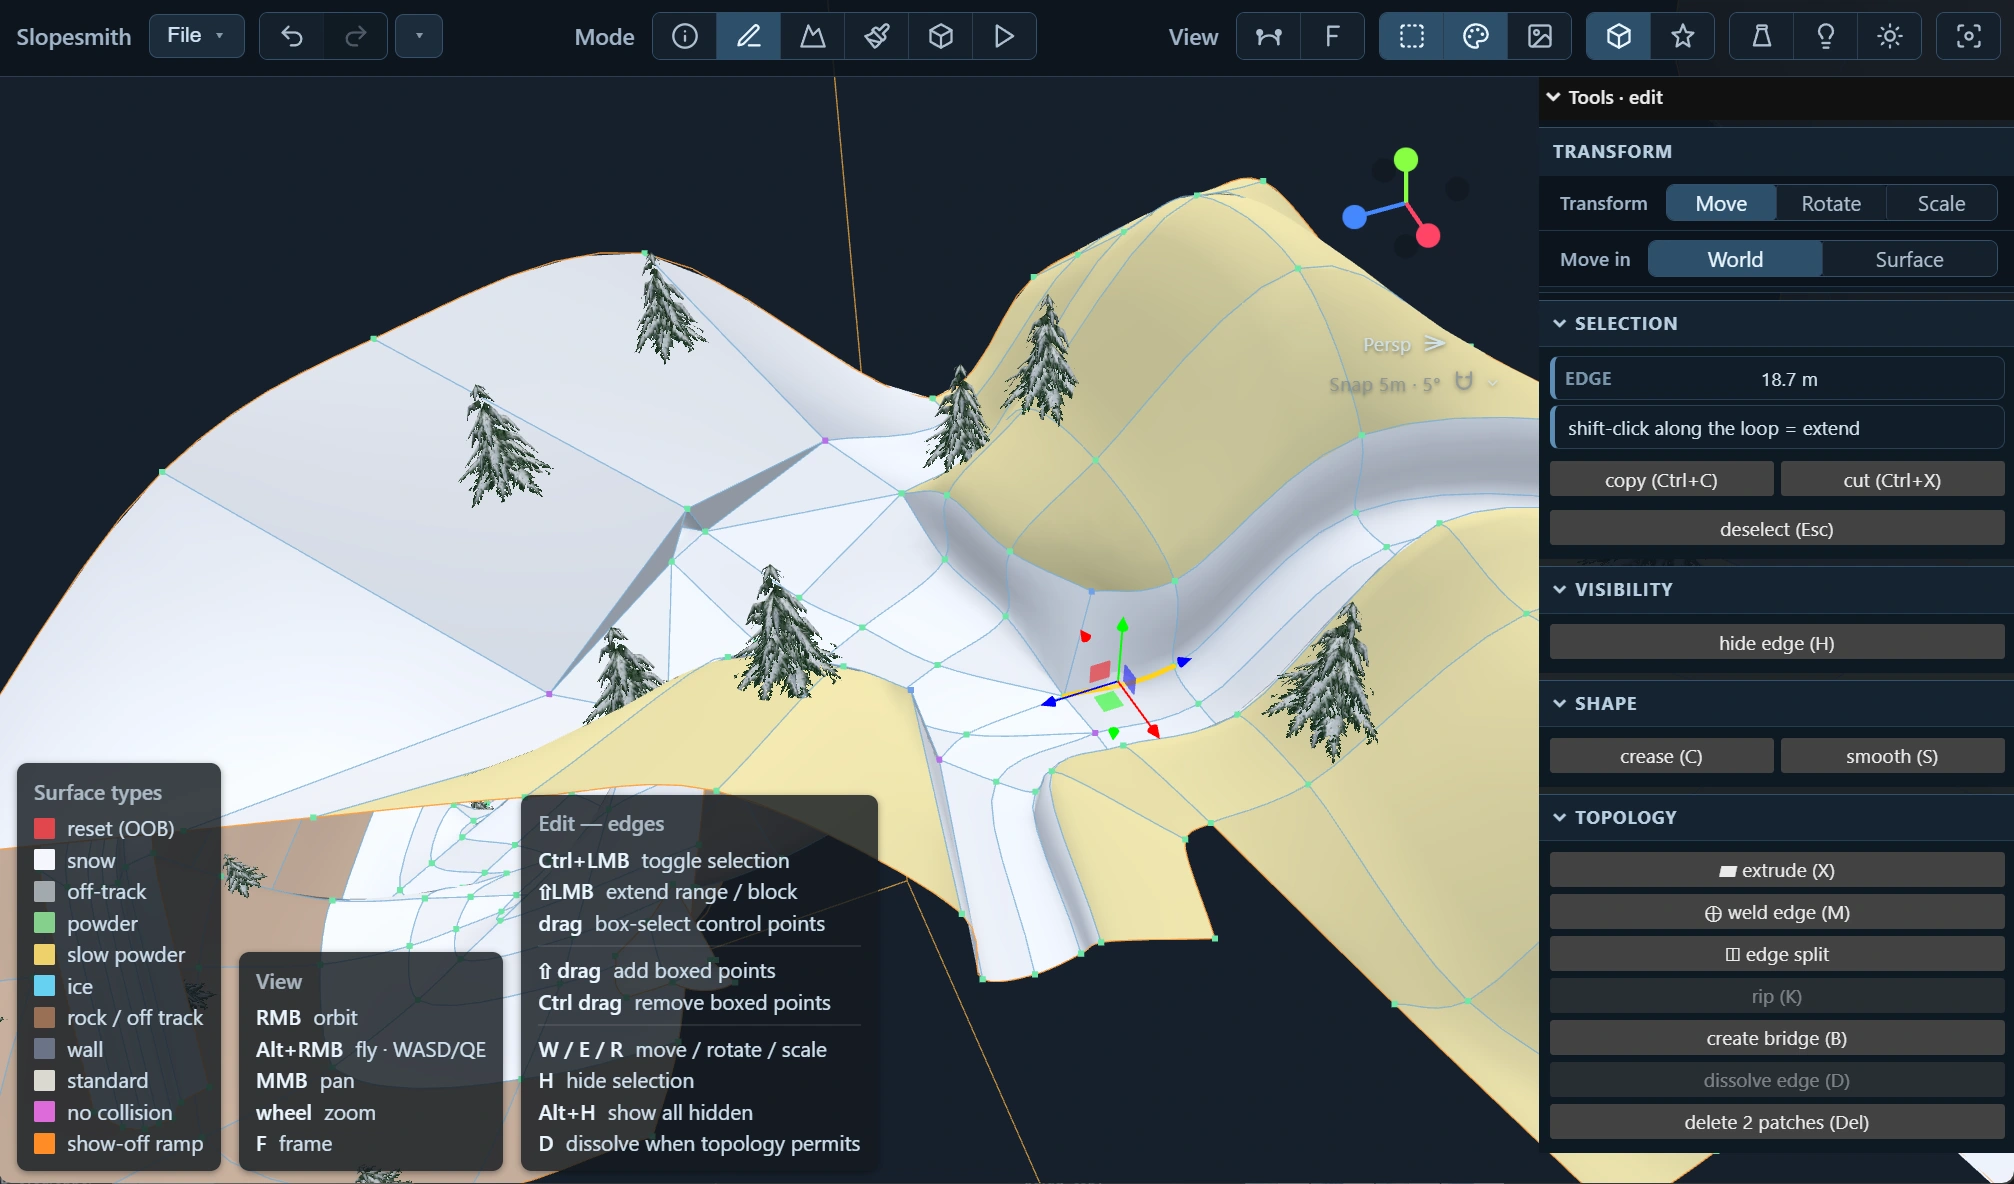
Inspect the tile’s material or ride-feel setting and use the Surface view to review the assignments across the mountain. The legend identifies snow, ice, powder, off-track areas, and other types.
Clearing a selected texture leaves the surface type in place. That makes the surface overlay particularly useful when you are working on unfinished or untextured terrain.
Try this: inspect one patch on the main line and one beside it. Confirm that their surface types match the behavior you intend before adding more texture detail.
05. Test the visual cue and the behavior.
Ride the section in Test mode. Check that the texture makes the line readable and that the assigned surface behaves as expected.
- Can the rider see the transition in time?
- Does the texture continue cleanly across patch boundaries?
- Is a change in grip or speed intentional?
- Does the route remain clear when props and effects are visible?
Return to Paint to fix the tile or surface, or to Edit if the geometry itself needs to change. Keep these corrections separate so you can tell which change improved the run.